Tuesday, June 12, 2012

Zaha Hadid...

...Never fails to amaze me. She inspired a lot of my work as an architecture student at Kent State. I am completely in love with this table! It's made out of glass but it really does look like floating water. It's so pretty I feel it needs a room to itself....with nothing sitting on it :)   I'm curious to know how YOU would style it, if at all?


You can read more about this new work of hers here.

Thursday, June 7, 2012

Frank Lloyd Wright inspired home outside of Cincinnati


 This home caught my attention while browsing HomeTrend's magazine online the other day.

The original article on it can be read here. 

I love the exterior of this home but the interior definitely left me feeling a little disappointed. The homeowner also owns a commercial interior design firm and this home's interior has commercial written all over it. I guess it's a matter of personal preference but I would love to see this home warmed up with some color, various textures and overall.....personality. What do you guys think?


dining room?........or conference room?

 This pool is a keeper for sure!


Monday, June 4, 2012

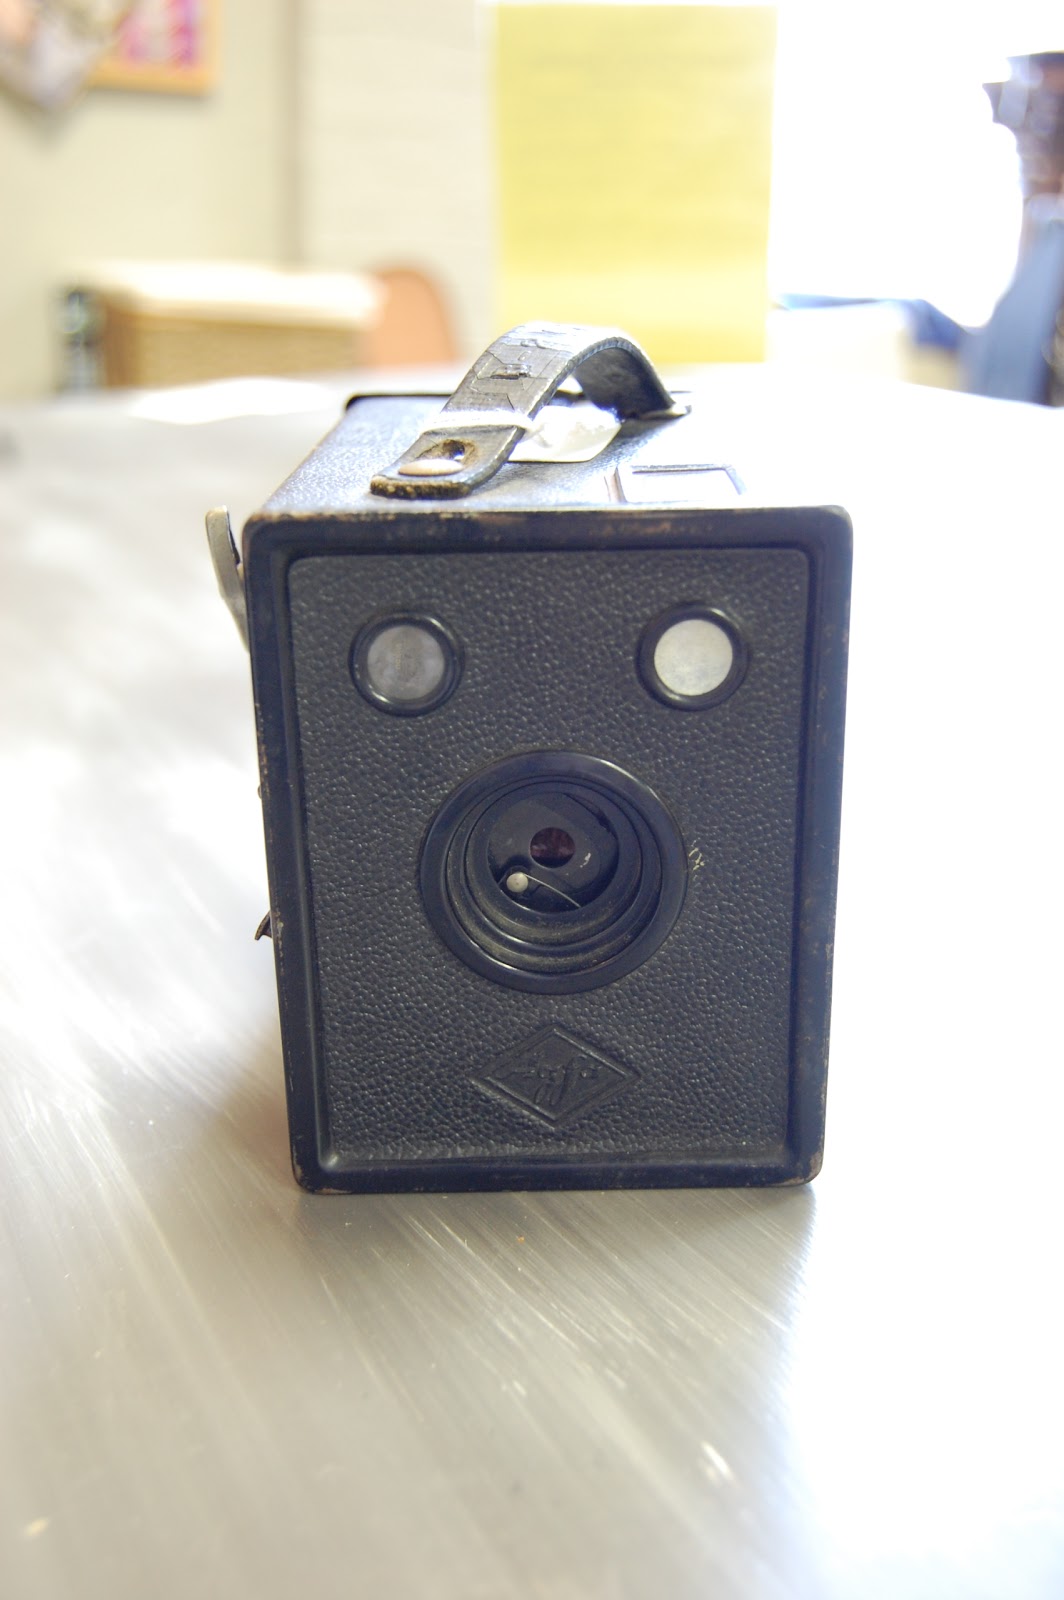
Vintage Cameras Galore

I added some new items to my etsy store over the weekend. My store is still kinda pathetic in the amount of things I have for sale but it will get there one of these days!

Agfa D-6 Cadet Box Camera, Circa 1935

Argus Model 814 Super Eight Video Camera

Bell & Howell 134-G Vintage USA Video Camera 2x8mm

Clix Deluxe Bakelite Camera with original box, circa 1930's
Keystone 1934 8mm Model K-8 Video Camera with stand and stand case

Minaki vintage camera

Vintage Sekonic 53EE 8MM Video Camera with Micro Eye, circa 1960's

1960's Zenith Portable Radio, Deluxe Royal 500
For more photos or information on any of these cameras, please click the "shop" button at the top of the page. Feel free to email me with any questions! Laura@happyroost.com

Friday, June 1, 2012

The Real Cost of Knock-Offs

I read this article in my latest Dwell Magazine last night before bed and I must say, it's the best article I've read in a long time. In our culture of cheap goods and furnishings, I think this article is a great reminder of "you get what you pay for." There are more and more knock-offs popping up everywhere and I think it's important, as a designer knowing how much time goes into things, to support the trade and not give in to a knock-off just because it's cheaper. This goes for fashion as well!

Please take the time to check this article out and let me know what you think!

http://www.dwell.com/articles/The-Real-Cost-of-Rip-Offs.html

Recognize these chairs? Well, they LOOK like Eames' molded chairs but these are actually from Overstock.com and are $189.99 for two. The real thing retails for $499 each. Is $500 really too much for a chair? I don't think so (think about Arhaus, ethan allen, or any other furniture store for that matter! nothing is under $500 in there!) Is it more than I can afford? Yes. So now go read the article for some good ideas about how you can score the real thing for less and stop supporting these Chinese knock-offs!

Tuesday, May 29, 2012

I'm back.....

After a week's hiatus from this little blog, I admit, it felt good to take a break. Yeah, I've missed all of you and I've missed reading and keeping up with your blogs as well (those of you that have them) but sometimes all this social media stuff becomes too much! (does anyone else despise facebook as much as I do?! I hate it but I feel like I have to have it to keep in touch)

I need to have some time to myself and lately that has NOT been happening while working 12-14 hours everyday, including most weekends. That doesn't leave too much time for writing posts, especially posts with any kind of thought put into them! Not to mention spending time with my husband in this supposed honeymoon stage of our first year of marriage. Also, my birthday is tomorrow and I'll be lucky if I get to celebrate by the end of June. ugh.


I need to getaway and relax for a bit. This winter when my business slows down it is ON!


O.k., enough with the pity party: that being said, I'm probably going to be writing less posts unless really super cool inspiring stuff worth sharing crosses my path. And until I can finally get some of my recent projects photographed. And once my business slows down a bit - I'm not complaining about having lots of work - I just wish this business wasn't either feast or famine. Some normalcy would be nice!


I love you guys and I look forward to sharing fewer but better posts with you.....at least until my sanity returns. xoxo.

Laura

Friday, May 18, 2012

Friday Feature: Albert Hadley

Albert Hadley lived a joyful and successful life as an interior designer. Sadly, he passed away earlier this year at the age of 91 (I only hope I can make it that long!). I stumbled across this great article earlier this week which includes some advice for younger designers. That being said, I decided to honor him by making him today's Friday feature.


I love how stylish this interior from the 70's is. Goes to show that good design never gets old!


I would put this chair in my own house for sure.


Have a great weekend!

~Laura

Thursday, May 17, 2012

DIY Upholstered Headboard


I made this headboard for the EcoRehabarama house I staged for this weekend and now I'm gonna show you how I did it. This was pretty easy to make and it turned out better than I thought it would for just about $100.

The first thing I did was search for my fabric. I bought this fabric from spoonflower and ordered 1 yard of the heavy cotton twill. The size was 58" x 36" which was the perfect size and the chevrons lined up perfectly. I'm glad I didn't mess this up because there certainly wasn't forgiveness having only ordered 1 yard!


Next, I designed and built the frame for the headboard using 1x2's and plywood. After it was built the whole thing got sanded.


Since my frame was a little larger than the fabric, I bought another fabric to sew around the edges. This could be out of anything. I thought about doing a bright, fun color but then landed on something toned down. I bought 2 yards of this fabric so I could cut a strip long enough to stretch along the top. Otherwise it would have to have a seam in the middle.

Next, my mom and I cut 8" strips of the beige fabric (if your padding is really thick you will want to cut the strips wider in order to wrap all the way around to the back where it gets stapled). We then pinned the top on, sewed it, pinned the bottom, sewed it, and then did the sides.

Once that was finished I ironed it really well making sure to press the seams flat so they don't show once upholstered.

I then laid the foam out on the flat side of the frame and cut it to size. I used 1.5" foam from Hobby Lobby. It was much cheaper there than at JoAnn. You can use something thicker if you want but it will make adding the nailhead trim much more difficult. I thought 1.5" felt plenty soft. 


I then used just a regular 'ol tacky glue to glue the foam to the frame.

Once it was dry I laid the sewn fabric on top and lined it up. I was careful to measure each side to make sure it was perfectly even. I didn't worry about the bottom since that would be blocked by the mattress and pillows. 


The next step was probably the hardest part of it all. The stapling. For this part I held it up and kept everything in place while my dad stapled. Start at the top center and work your way out to the edges working wrinkles out as you go. Make sure you pull the fabric the same amount of tightness or else your finished product will look all lumpy.

Once all 4 sides were stapled, we got to the fun part - the nailhead trim. I cheated a bit on this step by buying this stuff by Dritz:


Every fifth "nailhead" has a hole where you put a nail in so you're not actually nailing down every single one.

Here, my dad is nailing in the trim.


Once that was finished I cut off the excess fabric on the backside. The headboard will just hang on the wall by a couple of screws. Make sure you screw into a stud to make it extra sturdy. Another helpful thing to do is use this:

This will help keep the fabric clean - especially the white parts!

Now we're finished!