Monday, October 29, 2012

Guest Room Renovation Revealed!


All of our hard work paid off because we finished the room on time! My cousin's wedding was this past weekend and we had some family come and stay with us.....the only problem was we didn't have a guest room. So we made one! (with lots of help from my brother and in-laws! Thanks guys!)

Before I show you more "After" photos I wanted to pick up where we left off last time and show you the flooring and trim installation.
The flooring is a vinyl that looks like wood. It's normally not a product I would choose, but for a basement it's perfect. It's extremely durable, waterproof, comfortable underfoot and actually looks pretty realistic!  It was easy to install also - it took Brian and I about 4 hours to do the room Monday night. Considering this was the first time either of us attempted flooring I'd say we did a pretty good job.


However, the crown moulding, baseboards and window and door casing was not so easy to install. Since the room wasn't square to begin with, details like these were hard to get right. We did the best we could, and with the help of Brian's dad (and tons of caulk!), I think it turned out great! 

Tuesday and Wednesday nights were spent working on the trim (late into the night I might add!)


 The furniture went in on Thursday. All the furniture and accessories were things I already had. This is how it looked for much of the day since I attempted to carry down the box springs by myself and couldn't get them to fit down either set of basement stairs. In panic mode I tried to think of other solutions including building a platform bed as an option.Yeah, I tend to get a bit crazy sometimes.


Luckily when Brian got home from work he was able to take the basement door off its hinges and squeeze down the staircase.
Alfie approved.


So now that we're all caught up, it's time for the good part. Here's the before again:


And here it is Friday morning before our guests arrived:


Before:


and After:

Gotta love the little details....


I am SO happy with how this room turned out. It was obviously the WORST room in the house and I'm happy that it's now one of the prettiest! It's given me inspiration to keep working on the rest of the basement. That should keep us busy this winter :)

For now, we still have a few projects to finish up in the yard before it gets too cold and then it will be back to the inside. I'll keep you guys posted!

~Laura

Wednesday, October 24, 2012

2012 Tipp City Christmas Homes Tour

It's never too early to start thinking about Christmas! That's what I'll be doing for the next month as I plan my decorations for my space at this year's Christmas Homes tour in the historic town of Tipp City, Ohio.

I have participated in this for the past 3 years since designers started getting involved with it. Each year about 10 privately owned historical homes open their doors to the public for a self guided tour. The homes are usually decked out with Christmas decorations in every room. Last year each designer decorated the dining rooms of each home. Remember my design? You can see it here.

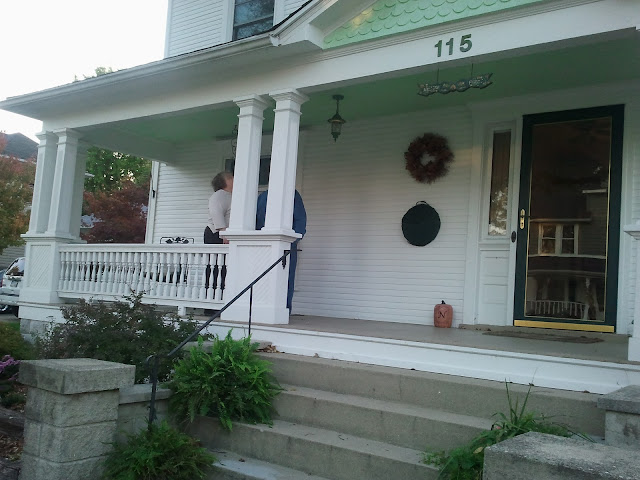
This year the designers are doing the dining rooms again but unfortunately for me, the home I was assigned to dropped out of the tour at the last minute! The committee graciously came up with another idea for me to do the front porch of another home instead. It think it will be fun to do something a little different this year! Here is my porch I will be decorating:


I'm planning on changing the rug and furniture for the show. There's also a hook hanging right above the table so I think I'll do some sort of chandelier there. 


I love all the railing and posts - plenty of opportunity for live garlands and such. 


Perhaps some large lanterns on these posts?


I'll let you know how this little project turns out. I'm sure I'll have fun doing it!

Have any of you started on your Christmas decorations yet?

Monday, October 22, 2012

Weekend recap of Basement Reno

The past weekend was a busy one with most of Friday, Saturday and Sunday spent working on the bedroom. It was also my husband's birthday on Saturday and I feel like I have some major making up to do since we spent most of his birthday working!

The good news is we finished up all the drywall and got the first coat of stain on the door (closet doors are finished and waiting to be installed also!)


The walls were then primed:


And finally painted with the light fixture installed:


The walls are Sherwin Williams "Intelligible grey" and the ceiling is Sherwin Williams "hazel" - a really pretty bluish green color. It looks great in the daylight! These colors were ones I already had from previous projects so it was a nice way to use up some up the million of paint cans I have in storage!

Here's another photo of what the light looks like. I'm trying to carry the craftsmen feel of the home throughout the basement as well.


Yesterday Brian and I purchased, stained and finished all the baseboard trim and casing for the doors. The window and the crown moulding will be painted "panda white". I also vacuumed and scrubbed the concrete floor in preparation of today's flooring installation (hopefully!!) We will be installing it ourselves after work today so it should be interesting, haha.

So here's my updated to-do list:
- Finish installing drywall
- tape all seams and put on drywall compound
- sand, prime and paint

- stain door to bedroom and finish staining closet doors
- install flooring (I think I'm most looking forward to this step!)
- install closet doors and shelving
- install baseboard trim, window and door casing and crown moulding
- Move in the furniture!!


Deadline to have everything finished is Thursday night! Wish us luck!

Friday, October 19, 2012

Friday Feature: Alex Papachristidis


 You can see more of Alex's work on his website here. Enjoy!


I love the over-sized mirrors hung so that they're angled downward. It definitely makes this small space feel large and puts an interesting twist on  scale.


I love everything about this one! I love how the black table helps to anchor and contrasts the light, almost fragile look chairs.The chandelier acts as artwork adding color and pattern to the space.


Thursday, October 18, 2012

Basement Bedroom Progress

I know, I'm FINALLY getting back around to this. So much has happened in the past month with traveling to Florida, meeting with new clients, planning Brian's birthday (coming up this weekend!), etc. that we made very little progress on the bedroom. Now that our guests are coming next Friday, as in almost a week from today, our butts are in gear to get this finished!

Here is what it looked like when we left off last time: (You can read more about it here)


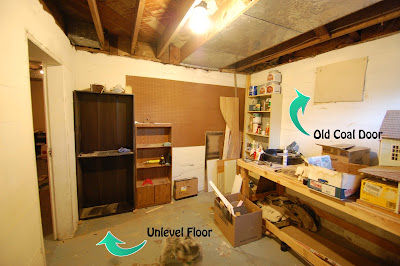
So since then we have framed two walls and the closet. The other two walls (exterior walls) are staying concrete. My brother convinced me to leave it exposed for maintenance issues down the road. The room will also be larger because of it and honestly, I kinda like the personality they add to the space not being perfect.

Sorry for these terrible photos! These were taken at like 1am last night after the work was finished for the day. 

You may notice that some of the framing is a little odd - well that's because this room is odd in general. Things had to be tailored to fit crooked walls and floors.

The inside of the closet is also staying concrete (it's an interior wall) so we did not frame it.


We used 2x3's instead of 2x4's in order to conserve some space since the room is pretty small (9' x 10')

 
Studs were then anchored to the concrete walls. This was also a huge pain. Our first attempt proved unsuccessful because we didn't have the right equipment. That set us back a couple of days. Notice the floor in this picture? That's how much the floor is off! I'm hoping it won't matter much once the flooring and baseboards go in.

We ran all the electrical wiring last night before starting on the drywall. The photo above shows the first piece of drywall to go in.

And more went up after that! Here are the boys at work; my husband (left) and my brother (right).


 We also replaced the door with a nice, solid oak door that was the door to a closet we're getting rid of on the other side of the basement. I'm gad we were able to reuse it. Again, this was a huge pain to change the door since the concrete door opening was nothing close to square. It will get stained in the next couple of days and I'm hoping it will look lovely :)

Here are the two walls that are staying concrete. We filled in the old coal door opening - not the best looking but it gets the job done! One day we may revisit it to fill it in properly but for now there's no time. I'm hoping to hide it some once the artwork goes up.


I'm really happy with the progress that was made last night but there's still a ton to do this weekend in order to stay on track. Here's what we still need to do:

- Finish installing drywall (our goal was to get it done last night but everyone was way too tired to keep working when 1am rolled around)
- tape all seams and put on drywall compound
- sand, prime and paint
- stain door to bedroom and finish staining closet doors
- install flooring (I think I'm most looking forward to this step!)
- install closet doors and shelving
- install baseboard trim, window and door casing and crown moulding
- Move in the furniture!!

Wednesday, October 17, 2012

Online Auction Addiction

My latest addiction has been online auctions. I think it will even take over my obsession with Craig's List!

Here are some totally cool things I've found recently for cheap!

Lucite furniture is really popular right now but I've never seen it like this before. How adorable is this little vanity?


LOVE this! And they had a set of two!


And no dining room is complete without a rockstar table....


Oh online auctions....where else would you find a crazy gem like this??!


Do any of you purchase items from online auctions?

Tuesday, October 16, 2012

Tuesday Tip: Jazz up your stairs

While searching for ideas for my basement staircase I came across this image which is totally cool!

Source: houzz.com via Laura on Pinterest


Here are some other fun ways to quickly give your stairs a facelift.

Paint....
Source: google.ca via Laura on Pinterest


Wallpaper....


Or make them look like something else... (my favorite!)
Source: whattopin.com via Laura on Pinterest


Monday, October 15, 2012

Bizarre Weekend Estate Sale....

I went to this estate sale over the weekend and it was seriously one of the craziest hoarder show-worthy  things I've ever seen.

There were 28, YES, 28 ROOMS full of vintage costumes, masks, shoes, hats, furniture, toys, play props, movie memorabilia, and even vintage/antique porn collected by an elderly woman. No, I didn't take any photos of the latter.


 These chairs I thought were super cool and they were in really great condition...and there were TEN of them! I hope someone scooped these up!


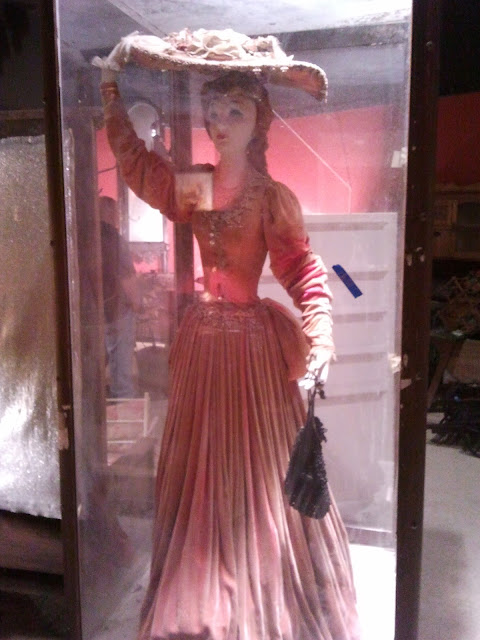
This was a costume from a movie....can't remember what though so I'm not very helpful :)


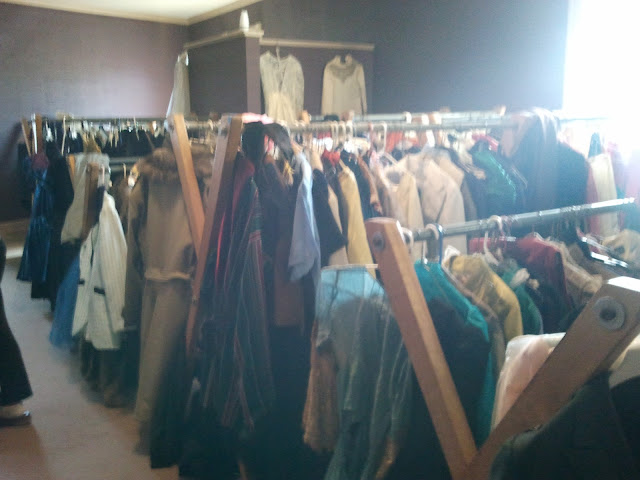
 One of about 3 rooms full of costumes. Just in time for Halloween!


And one of 2 rooms full of nothing but hats. Like I said, craziness. 


And a couple of rooms full of toys. It was pretty creepy in there - I didn't stay long.


 And this was creepy too.


The sale, while I didn't buy much, was still worth going to. In fact, I think they should have charged admission! It was a sight to see although by the end of it I was feeling overwhelmed, claustrophobic and just a bit creeped out in general. I went home and, after washing my hands right away, began packing stuff up for Goodwill. It is one of my fears to end up like that - old, alone, with a ton of crap everywhere. I think designer types in general tend to collect hoard things because really, we know we'll find the PERFECT spot for IT one day, right??

p.s. sorry for not posting very often anymore. Honestly it's hard to find the time and the inspiration to do it all the time! Kudos to those of you who are consistent! I promise, when I have something worth sharing (like the gems above), you will be the first to see it. Hope you had a lovely weekend!